Details: Yes, I know it has no historical context, a bit controversial. This started as a fun project of mine that I didn’t intend on releasing, but I figured I might as well. It’s a fully functioning version of Wake Island based on BF1943 version. All commander abilities work tested and spawn protection working.
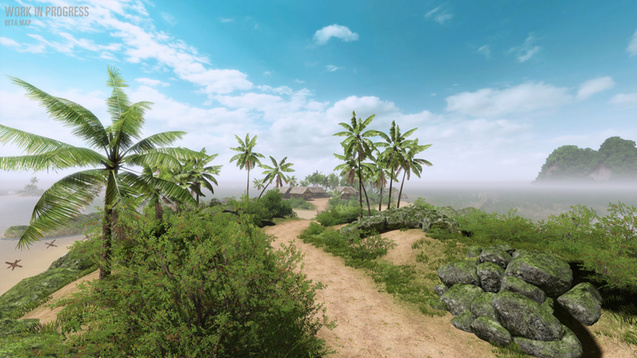
Time for Holidays on a beautiful pacific island with corals and at times napalm and artillery showers. 8)
The machine-gunners' dreams of point blank fire into serried masses of Emus were soon dissipated. The Emu command had evidently ordered guerrilla tactics, and its unwieldy army soon split up into innumerable small units that made use of the military equipment uneconomic. A crestfallen field force therefore withdrew from the combat area after about a month.
- D.L. Serventy, ornithologist on the Emu War from 11–12.1932 between Royal Australian Artillery and 20,000 emus
I have played three full (means on both sides) games.
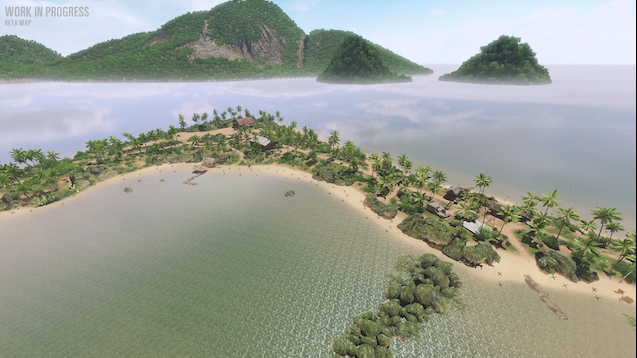
The map has the following capture points:
A – Australian base, connection to B
B – uncaptured, closer to A, connection to A and C
C – uncaptured, closer to D, connection to B and D
D – VC base, connection to C
At the start A rushes to B and D rushes to C in order to capture.
On the beach between A and B you can shoot to the point between C and D and vice versa.
Still, there are only 1-2 kills since the distance is high and its only a small time window till the main force is at B or C.
Once each force has captured B (Aussies) or C (VC) the main problems start.
First, you don’t get a closer spawn point, so you have to start from A/B instead of closer to C/D.
This puts the Aussie SL onto huge pressure, since if they die, you have a long way to run.
VC just puts its tunnels on C, which is perhaps not optimal, but it guaranties that your soldiers will always spawn closer without the fear of losing the tunnel.
Then there is the fight between B and C where it is basically a bloody brawl with Grenades and MG fire everywhere.
There you have three routes.
Route 1: Beach closer to A and D
You probably get sniped from either between A and B or C and D depending on your side.
Perhaps the worst route.
Route 2: The upper Route
You have plenty of cover with trees and bushes which seems nice first until you realize that everyone is throwing grenades.
Either you are at the front and get killed by the enemy grenade or you push forward and run into the grenades of your buddies since they are not knowing where they are throwing.
Oh and of course smoke, either bushes, trees or smoke, you most likely see nothing, which somehow makes the bayonett the best option, sarcastically speaking.
Did I say the first route was bad? The second isn’t any better…
Route 3: Beach away from A and D
Ok, you don’t get sniped and you can see more than 5m… but thats it.
The fighting is as hard as on the other routes.
Perhaps thats the main problem, you can’t really outflank the enemy when the front is so dense with 64 players on a perhaps 50m frontline.
Commanders can’t do very much at that point, since hitting the land between B and C splits the map in half.
The area covered by arti or napalm is so huge that your troups can’t progress and the enemy maybe dies but regroups behind your own obstacle and rushes back into the fight as it vanishes.
Again, aussies are in disadvantage here, since 1-2 SLs are maybe dead and all have to run while VC tunnels are most likely save in the background.
Of course, if you are close to B (as VC) or C (as Aussie) you can cut of reinforments from base (A or D) by hitting between A and B or D and C and therefore cap the third point.
If this happens the game mode of the map basically switches on defense mode for one side (the one with just the Base left) and attacker mode for the opposition (with three points).
Now you’re stuck in the base or try desperately to attack the base.
That is the best part where the aussies can win since it is now all about tickets which each side has lost alot between B and C.
So far the results were:
As Aussie, close to C but lost on tickets
As Aussie, at A defending, win because of tickets drain of enemy
As Aussie, at A defending, lost because of capturing A
As VC, at A attacking, win because of capturing A
As VC, at A attacking, win because of capturing A
As VC, at A attacking, lost because no more tickets
I would suggest following improvements:
– new spawns when B or C are captured to ensure smaller ways back into the fight otherwise Aussie seems a bit in disadvantage
– Real underground tunnels or something between B and C, this opens more routes, which also aren’t blocked by arty
I don’t know if these improvements help since i think it will stay a close combat map with no option for flanking, which i think is the main problem why no one likes the map very much.
Still, i think the map looks beautiful and the game mode switch when capturing three points feels interesting.
I will give the map a few more tries perhaps there are some tactics i am missing.
The machine-gunners' dreams of point blank fire into serried masses of Emus were soon dissipated. The Emu command had evidently ordered guerrilla tactics, and its unwieldy army soon split up into innumerable small units that made use of the military equipment uneconomic. A crestfallen field force therefore withdrew from the combat area after about a month.
- D.L. Serventy, ornithologist on the Emu War from 11–12.1932 between Royal Australian Artillery and 20,000 emus
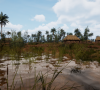
Yeah, and I mean, graphically is cool. But you have to run a LOT without doing anything, it’s really narrow and most people don’t like it very much. I think we have better maps to focus on, let’s say.

 Kove.
Kove.